
You Just Bought Copernic! Now What?
Congratulations on your decision to add Copernic to your arsenal of tools! Once you make your purchase through our payment partner, you will receive an email from them (Avangate /2Checkout) with your license key. If you don’t see it in your Inbox, you should check your Junk or Spam folder. In that email, you will also be invited to set up an account in our Customer Portal. It is here that you will be able to browse our articles answering common questions, view our forums and connect with other Copernic users, and submit a support ticket for any questions you might have.
The Customer Portal is not to be confused with your account with our payment partner. Your MyAccount with our payment partner which allows you to check and/ or modify your existing subscriptions.
Once you’ve received the email with your license key, you will want to download the file to your computer. Once it’s downloaded, you will need to import it:
1. Open Copernic
2. Go to “Extensions / Licenses”
3. Click on Import license file
4. Select the license file that was received
5. It will activate your extensions

It is important to note that the initial index can take some time to complete, depending on the number of files you have. Under the Tools menu, you may select the Indexing Performance that suits your needs.

A detailed explanation of Indexing Modes can be found online but the differences are outlined below:
Unrestricted:
- Uses all available resources on the computer.
- May be useful to perform a quick build of your index but could impair responsiveness of other applications.
Restricted:
- Pause indexation if the Copernic Desktop Search process exceed 40% of CPU usage.
- Pause indexation if the Copernic Desktop Search process global I/O (disk and network) uses more than 40% resources.
- Pause indexation for 10 seconds when the focus is in the main interface and you use the computer.
- Pause indexation for 2 minutes when the focus is outside of Copernic and you use the computer.
- Pause indexation while computer is on battery mode.
Smart (Default):
- Wait 10 seconds between item indexation if the Copernic Desktop Search process exceed 40% of CPU usage.
- Wait 10 seconds between item indexation if the Copernic Desktop Search process global I/O (disk and network) uses more than 40% resources.
- Wait 15 seconds between item indexation if you use the computer. Recover after 10 seconds when the focus is in the main interface or 2 minutes if the focus is outside of Copernic.
- Pause indexation while computer is on battery mode.
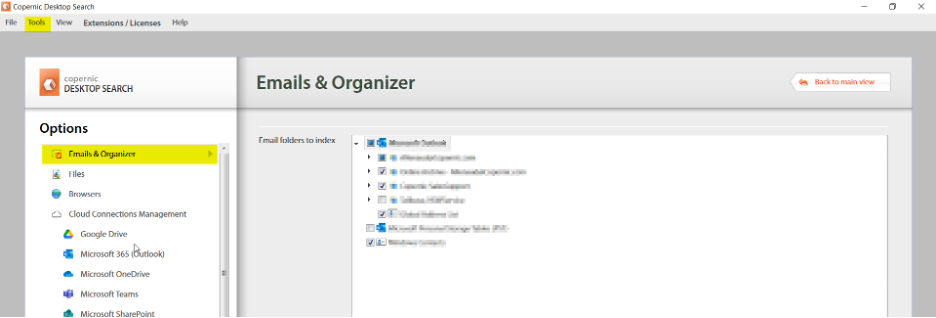
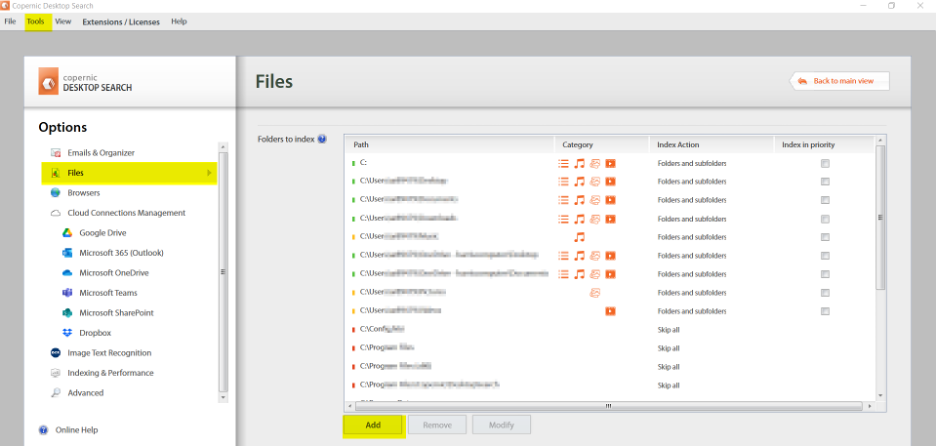
Under the Tools > Options menu, you may select the Emails & Organizer you would like the system to Index. You are also able to assign the Folders to Index under the Files menu.
Using the “Add” feature will allow you to add files folders you would like to include in the index.
Once your index is complete, you can start to experience the speedy efficiency of Copernic! To start, you will enter the keywords you would like to search in the Search bar (highlighted yellow in the following screenshot). The file icons (outlined in blue) will break down the results further. Additional tips and tricks can be found on our Blog as well as in the Knowledge Portal. If you have any questions, please don’t hesitate to reach out to us at support@copernic.com.
